Step 1
First, unbox all of your parts. Be they in plastic bags foam, whatever, make sure you don't misplace any tools they might have come in
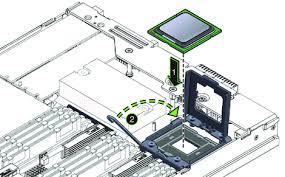
Next, Place your CPU into the appropriate socket. You do this by lifting up the metal arm on the side of the socket, then lining up the arrow on one corner of the cpu with the corresponding arrow on the socket.
Carefully lower the CPU into the socket, making sure not to bend any pins. lower back down the arm, and your CPU is installed.
There should be 4 evenly spaced holes around the CPU socket
Step 2
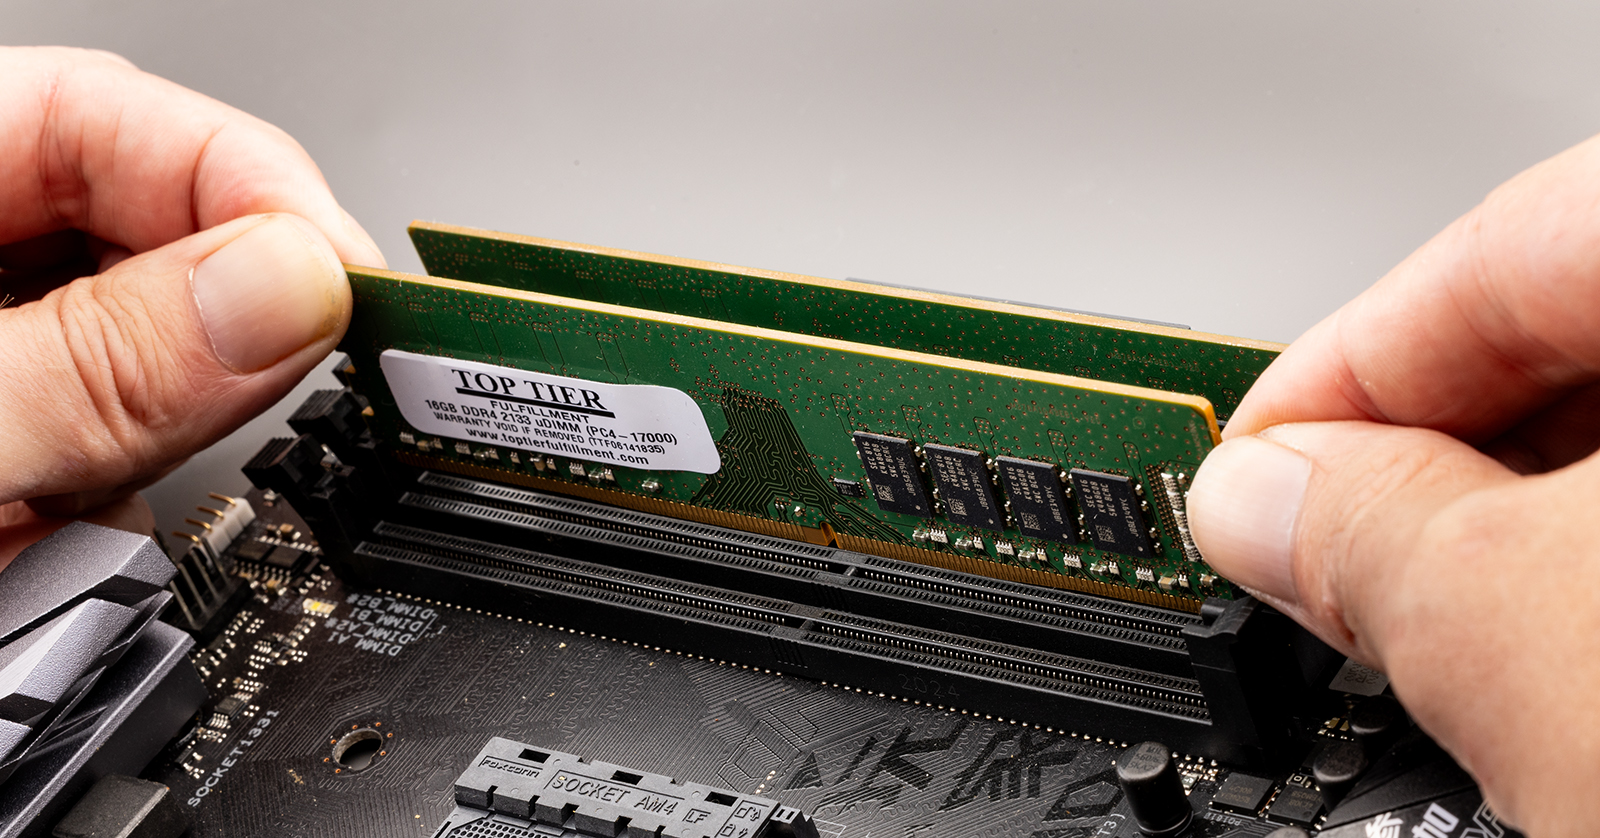
Next, install the RAM. These should fit into to two long verical slots, usually installed to the right of the CPU socket. Make sure that they are oriented the right way, so that the notch in the connecter
        Lines up with the markers on the slot, then press down the bottom part of the stick. Once you feel a click, press down  the top part until you feel another click.
        Repeat with the next stick of memory, making sure to place it in the slot that is color matched with the last slot.
Step 3
        Next, install the motherboard into the case. Your motherboard should have included a thin piece of metal. Open the case by either undoing the thumb screws on the back of the case,
        or opening the door. this depends on the case. Insert this piece of metal into the appropriatly sized case in the back of the case.
        Turn the case on its side  and align the holes in the side of the case, and make sure the ports on the back of the motherboard lines up with the holes in the piece of metal and
        with the standoffs/screw holes on the motherboard. Use the screws and screwdriver that should have been provided witht the motherboard to tighten these screws.
Step 4
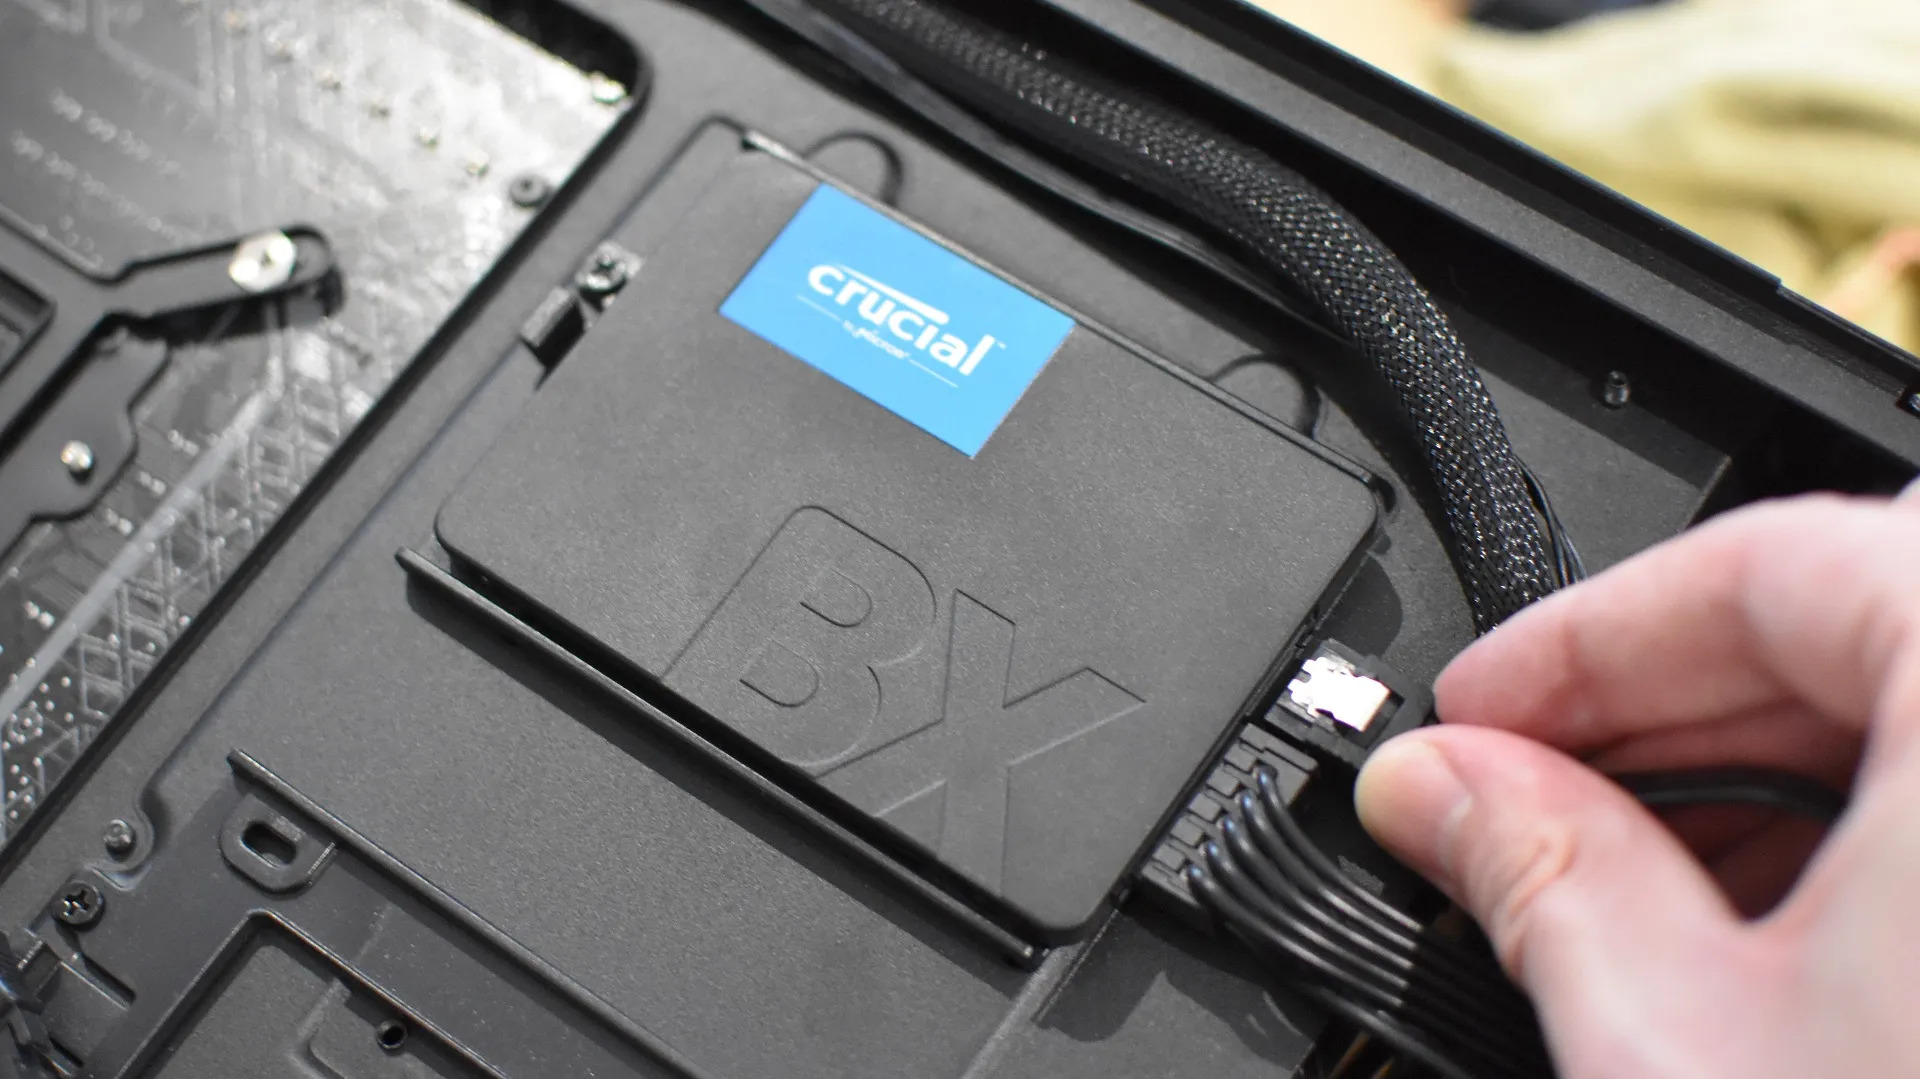
        Undo the screws on the right side of the case (the side that isnt already open). You should see both a large open space, and a 2,5 inch HDD/SSD cage.
          Squeeze the two sides of the tray inside that cage. It should slide out. Insert your drive into the tray, by placing it ontop of the tray, and pushing down until it clicks in.
          Connnect the SATA cable that was included with either your motherboard, case, or drive, to your drive making sure it exits out the back of the tray. slide the tray back into the cage,
          with the SATA cable going up towards the Motherboard. Connect this cable to the appropriate conector on the motherboard
Step 5
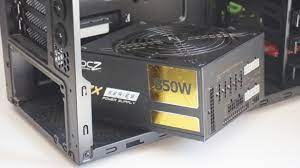
     Place the power supply in the empty space at the back of the case in the lower compartment, lining the screw holes on the PSU up with the ones on the case. use the screws that came
            with the PSU to attach  it to the case. you will need to route the nesecary cable to the motherboard.
- An 8 Pin power connector for the motherboard
- A 4 Pin power connector for the motherboard
- you may require a 6 pin connector for your gpu
- a SATA power connector for your SSD
Step 6
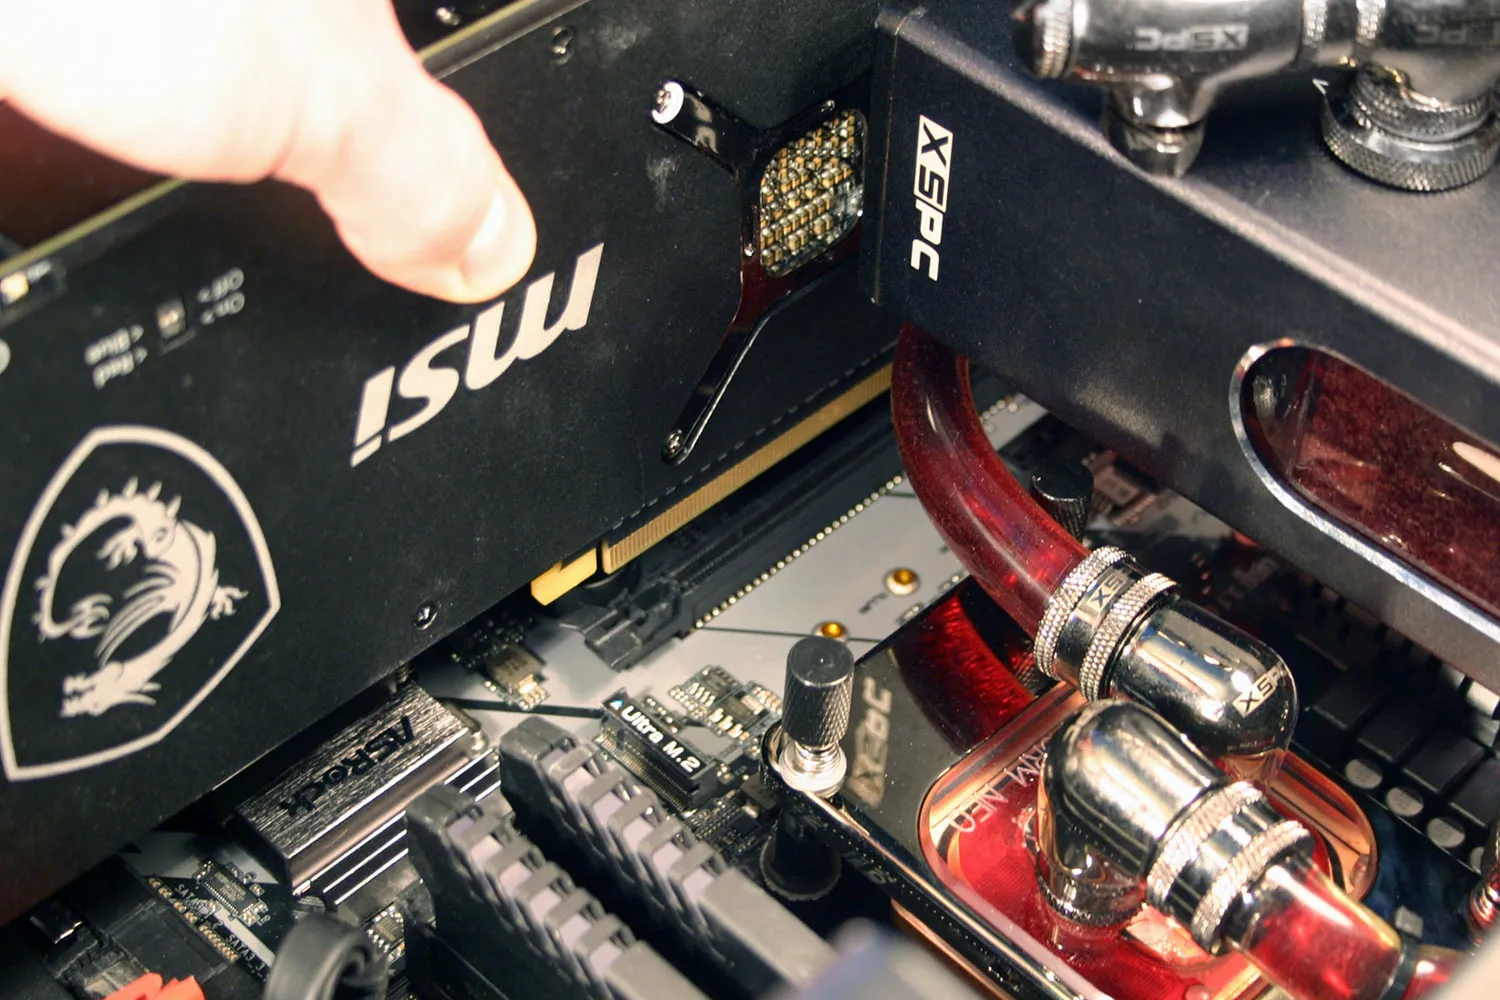
       Underneath the CPU Socket, there should be a long, horizontal, segmented slot, usually black or beige in color. This is a PCIe slot, and where your GPU will be connected.
        Unscrew the slot cover on the back of the case, which will either be mounted with a thumb screw, or will be a cheap pice of metal which just comes out.
        Position your GPU over the slot (as seen in the image below), and push it down until you hear an audible click. use a scrrew to fasten the GPU to the case. Higher grade GPUs may require a
        6 pin power connector, which will be located on the side of the card. Route a cable, from the PSU to the GPU and push it into to the connector until you hear a click
Step 7
YOURE FINISHED!!!

*this site is blahaj approved*